> ## Documentation Index
> Fetch the complete documentation index at: https://docs.hubtalk.ai/llms.txt
> Use this file to discover all available pages before exploring further.
# Getting Started
> Quick start guide for using HubTalk AI v4.
# Getting Started with HubTalk AI v4
This guide helps you begin with HubTalk AI v4 in a few simple steps. It focuses on the user experience: creating an agent, testing it, and connecting it to your phone system or webhooks.
## Start with a clear goal
Begin by defining the main task your agent should solve:
* Answer customer questions
* Book appointments or handle reservations
* Route calls to the right team
* Collect customer details during a conversation
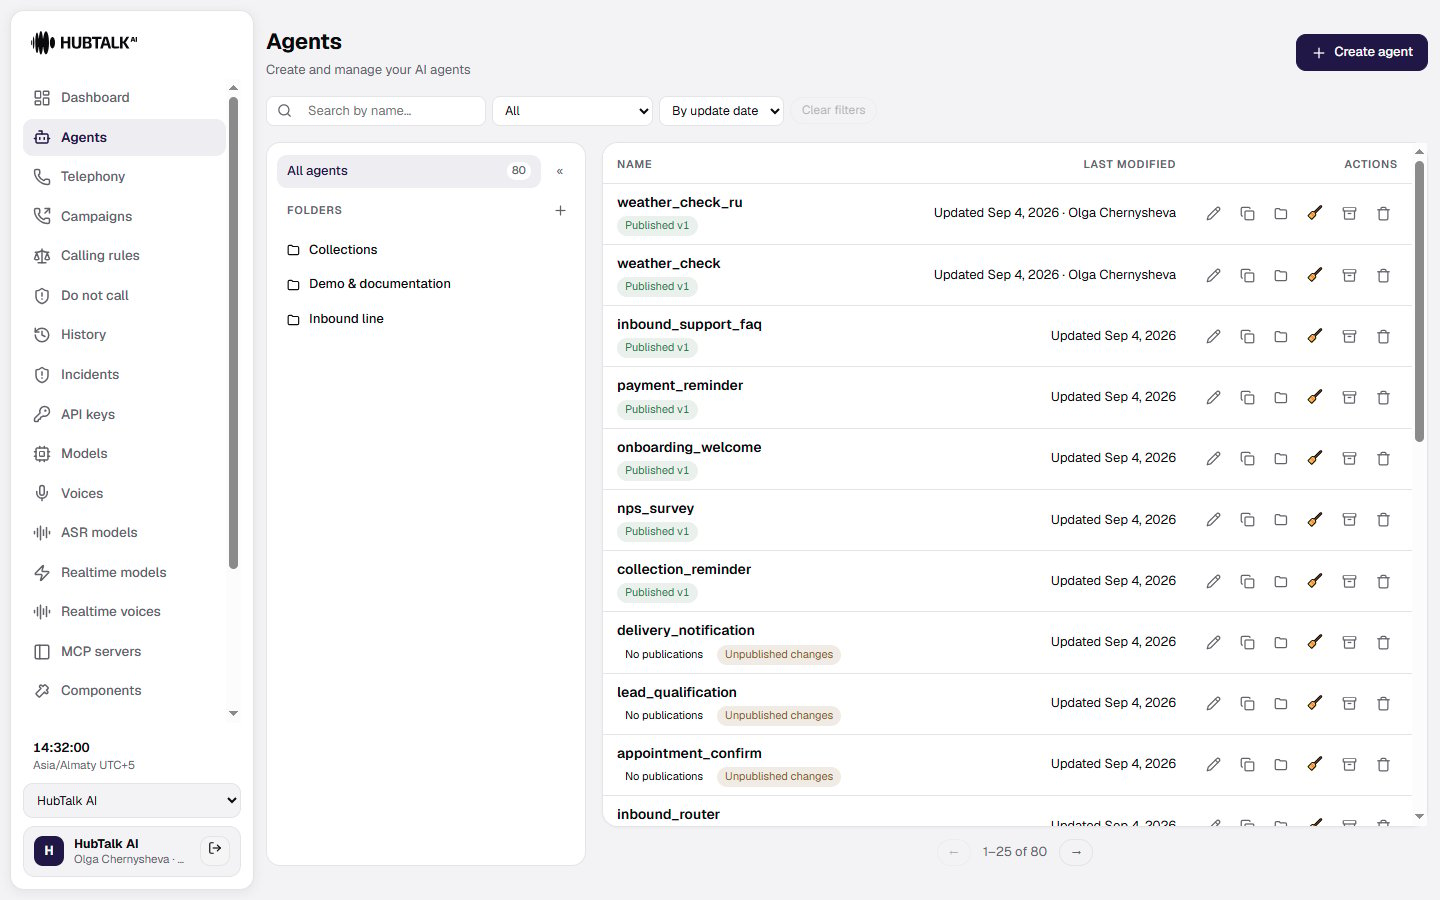
## Step 1: Open the Agents section
Go to the **Agents** page in the v4 section and create a new agent. Give it a name and describe the customer scenario it should handle.
 ## Step 2: Configure the conversation
Set up your agent’s greeting, prompts, and response flow:
* Add a friendly greeting message
* Define how the agent should ask questions
* Add actions like transfer or end call when needed
* Use built-in prompts to keep the conversation natural
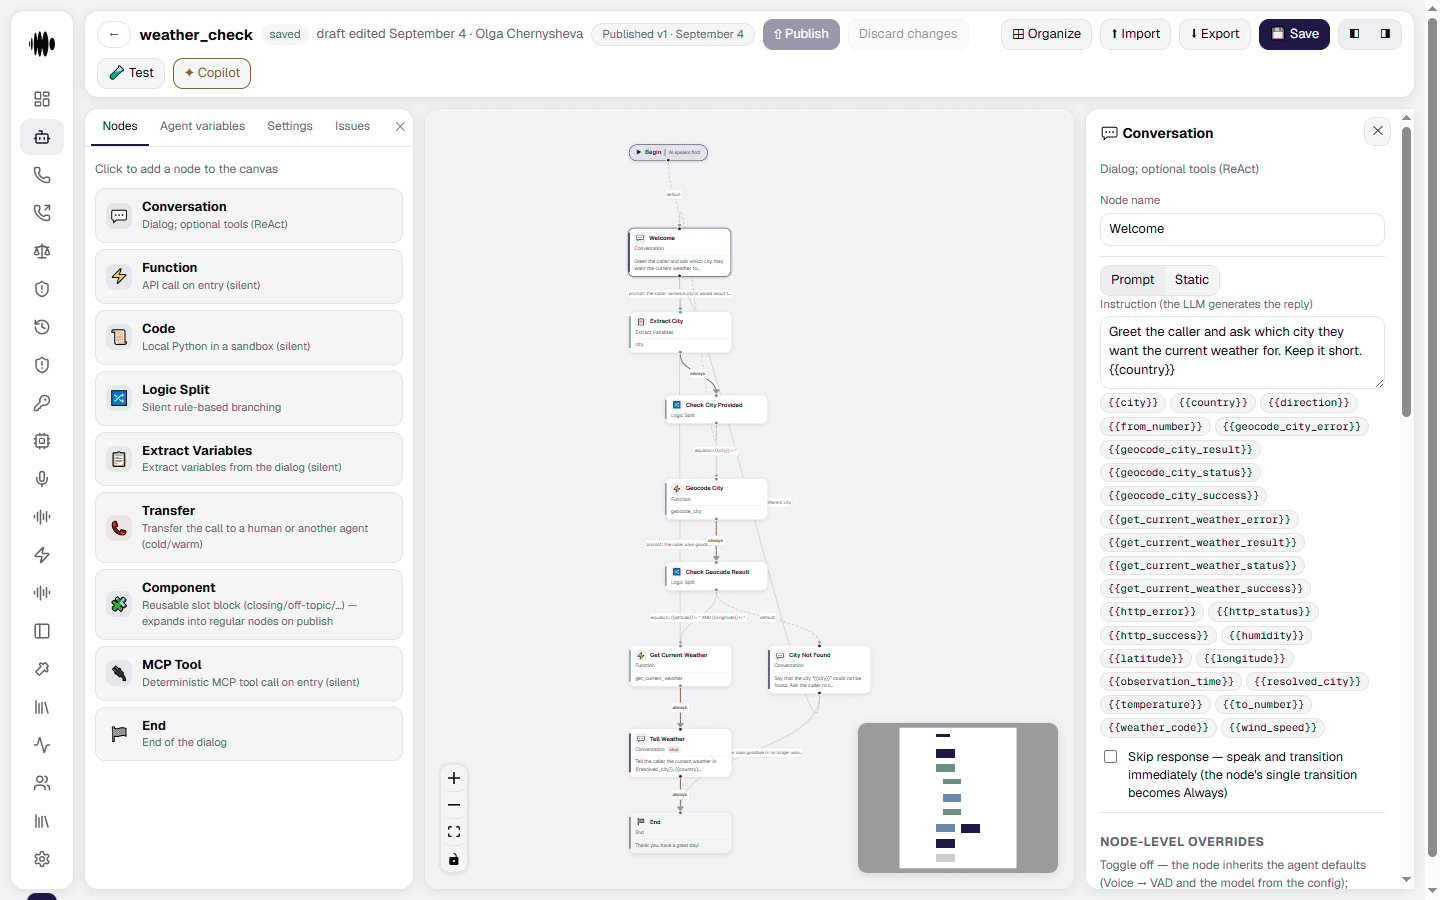
## Step 2: Configure the conversation
Set up your agent’s greeting, prompts, and response flow:
* Add a friendly greeting message
* Define how the agent should ask questions
* Add actions like transfer or end call when needed
* Use built-in prompts to keep the conversation natural
 ## Step 3: Test before launch
Use the built-in chat and voice testing tools to validate the agent:
* Try common customer requests
* Confirm the agent follows the expected path
* Make adjustments if the flow is unclear
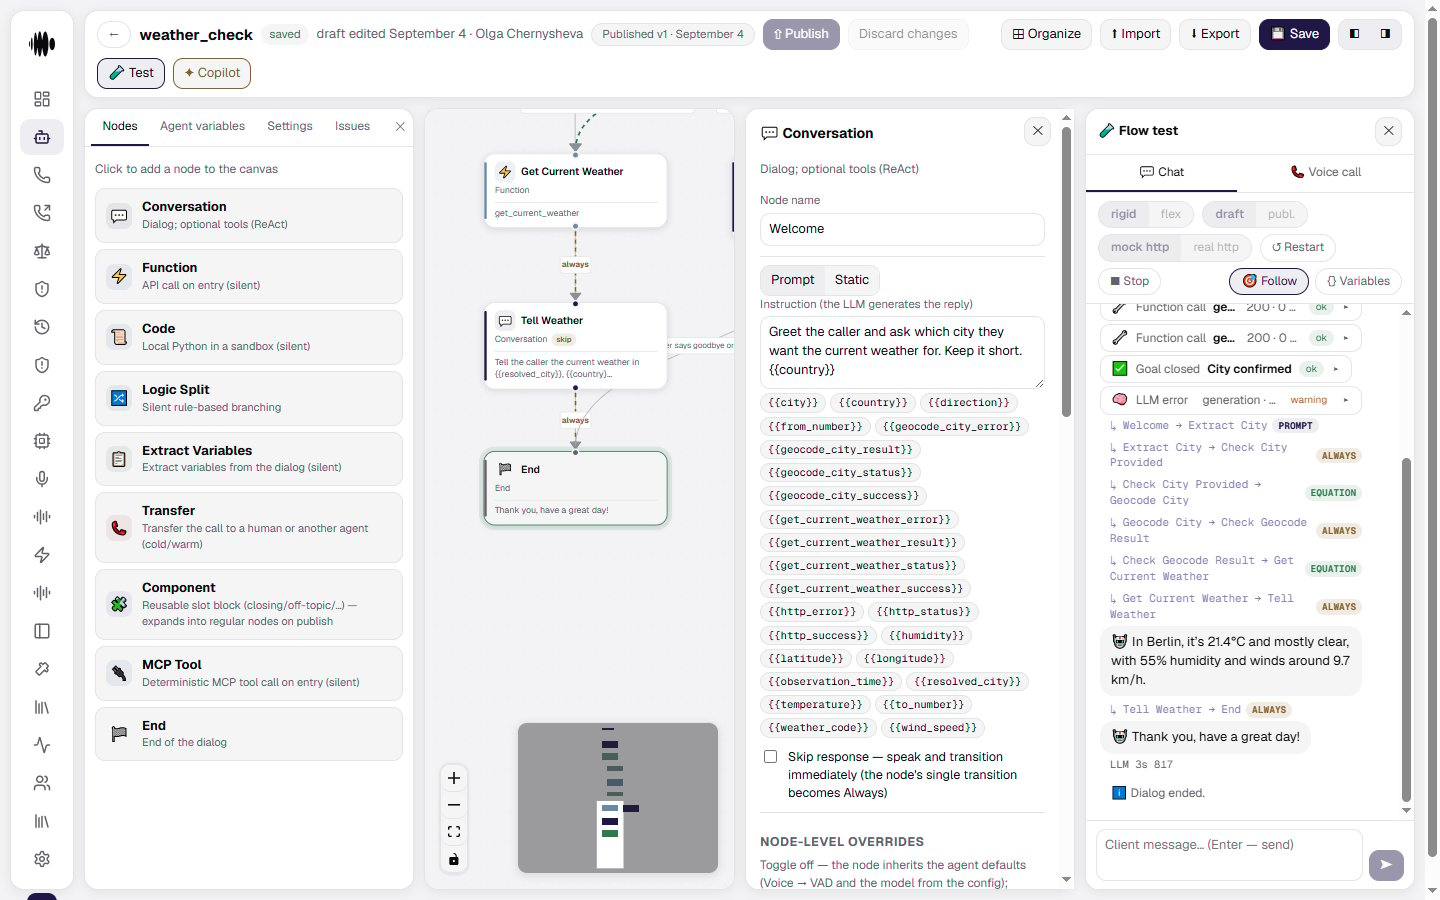
## Step 3: Test before launch
Use the built-in chat and voice testing tools to validate the agent:
* Try common customer requests
* Confirm the agent follows the expected path
* Make adjustments if the flow is unclear
 ## Step 4: Connect voice and webhooks
When the agent is ready:
* Connect a phone number or SIP trunk in the **Telephony** section
* Configure a **webhook** to receive call data and analytics
* Review call results in the dashboard
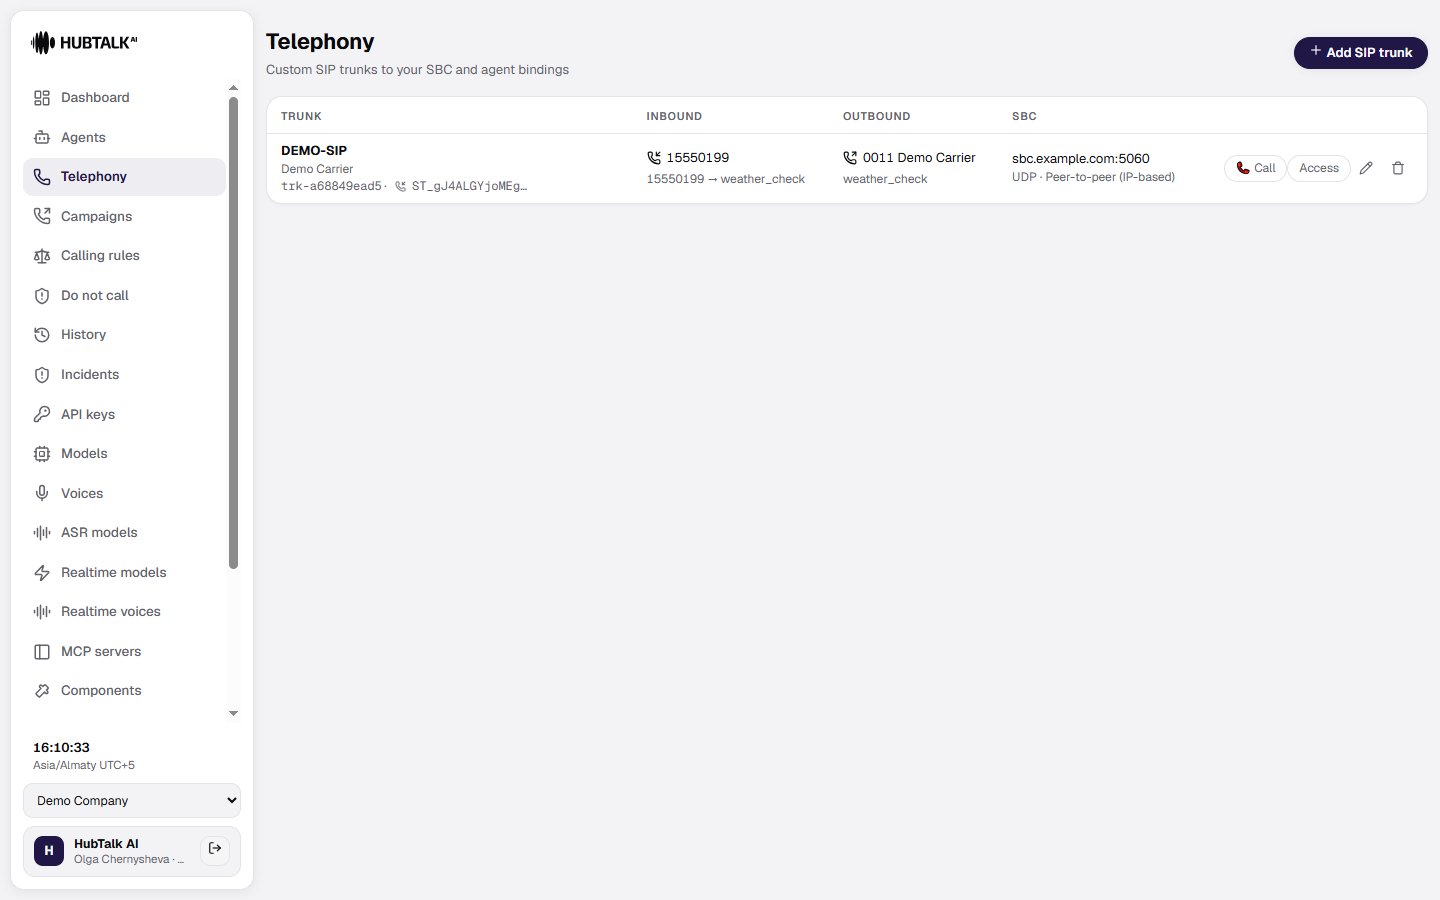
## Step 4: Connect voice and webhooks
When the agent is ready:
* Connect a phone number or SIP trunk in the **Telephony** section
* Configure a **webhook** to receive call data and analytics
* Review call results in the dashboard
 ## Step 5: Review and improve
After the first tests:
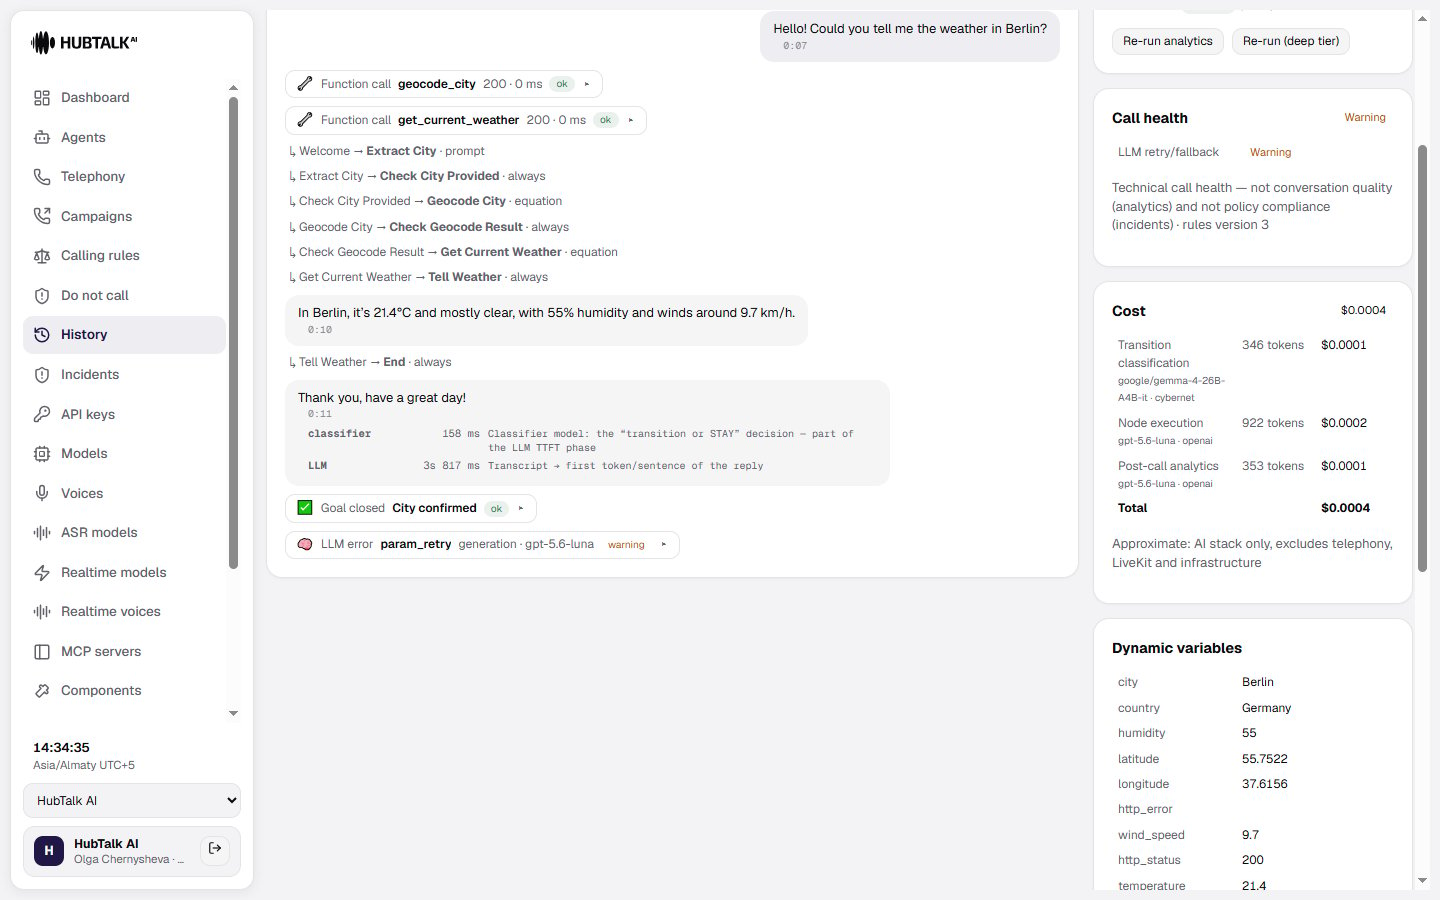
* Check call transcripts and performance
* Tune prompts and handoff conditions
* Update the flow if customers ask unexpected questions
## Step 5: Review and improve
After the first tests:
* Check call transcripts and performance
* Tune prompts and handoff conditions
* Update the flow if customers ask unexpected questions
 ## Where to go next
Refine your agent’s conversation and actions.
Enable integrations with your internal systems.
## Where to go next
Refine your agent’s conversation and actions.
Enable integrations with your internal systems.